Interior Interface Panels
The interior panel is designed to have more modular panels and to manage the visualization of a virtual tour of the interior and above all to exploit the functionality of the configurator which is the main function apart from being able to move around the interior.
This configurator is connected to the web configurator which is activated on a regular basis.
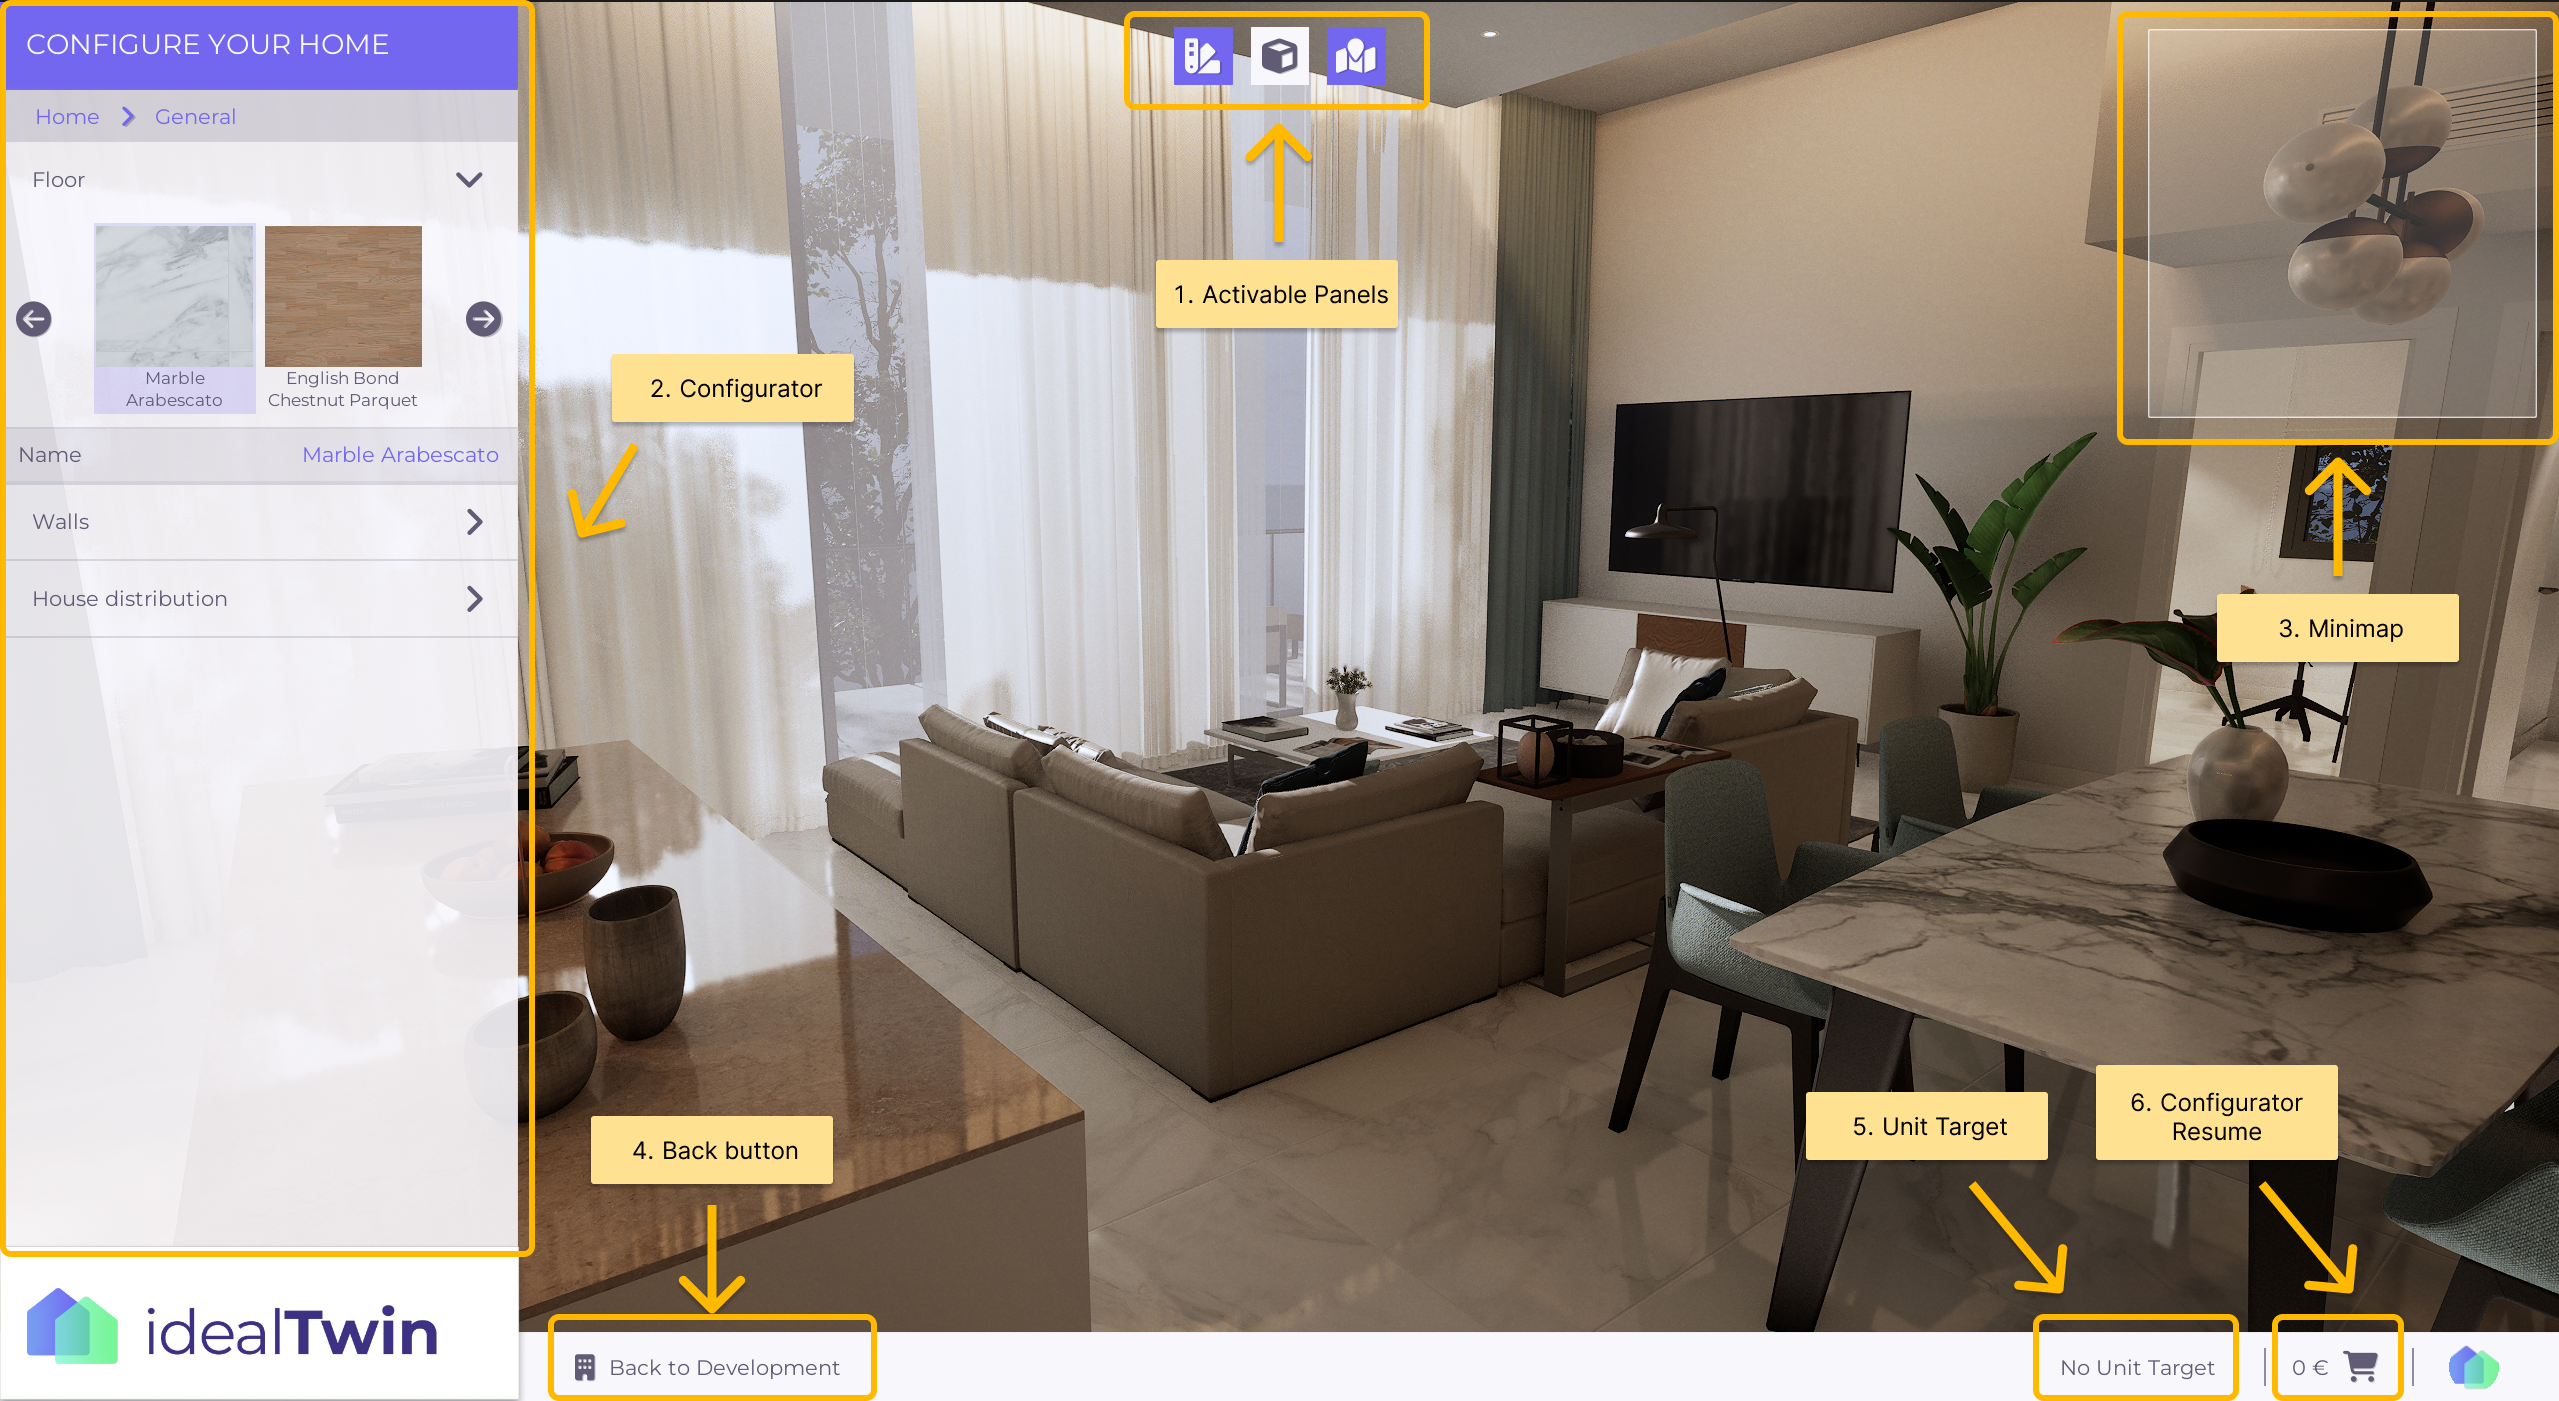
1. Activatable Panels
In the interior design, instead of a navigation bar, buttons have been implemented to hide or show panels internally. There are also buttons on the bar that perform actions to change states, such as toggling between first-person view and orbital view.
The buttons are as follows:
Show/Hide Configurator
Switch between first-person view and orbital view
Show/Hide Minimap

2. Configurator
The configurator, being the most prominent element of the interface, consists of a menu of drop-down options that represent the categories y subcategories available. When a subcategory is selected, the variants are presented horizontally, each labeled with its name and accompanied by a thumbnail image.
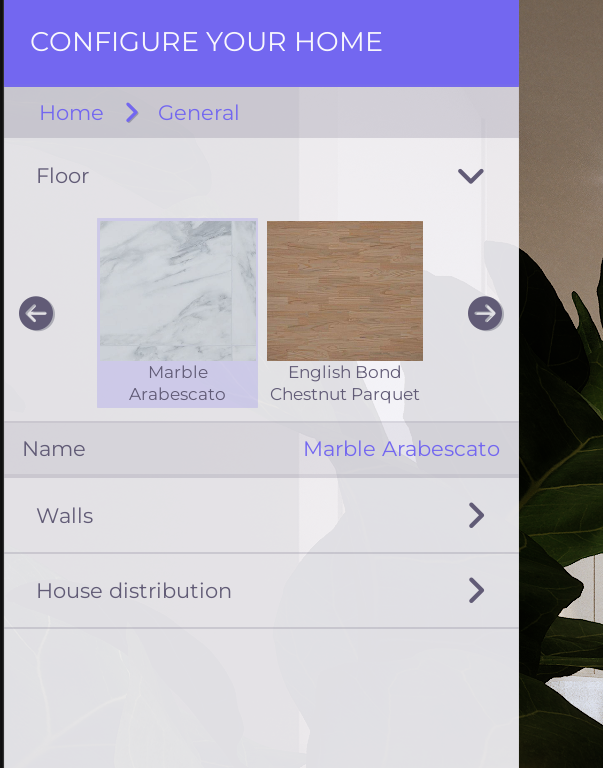
At the top there is also a navigation bar for the current category that allows you to return to previous categories easily.
3. Minimap
The minimap provides a representation of the unit floor plan and the location of the elements. A highlight is the representation of the user on the minimap, which indicates his current position.
In addition, it is possible to add actors to the map using the component MinimapElementComponent and assign custom icons to them, thus improving the visualization of the location of these elements.
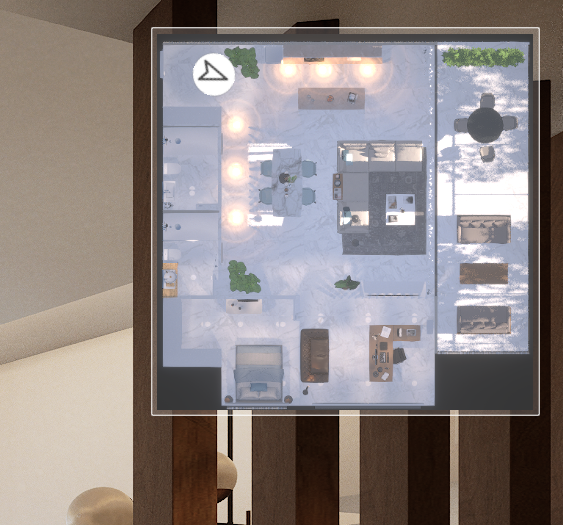
The minimap provides spatial context for the different areas of the home.
4. Return to the Exterior level
When visiting the interior maps, this button allows you to return to the exterior map of the development in order to access another type of house.

5. Selected Unit
This is the selected unit to which the configuration to be saved or loaded from the web interface will be directed. If the unit is not selected, this functionality will not be executed and the message "NO TARGET" will be displayed.

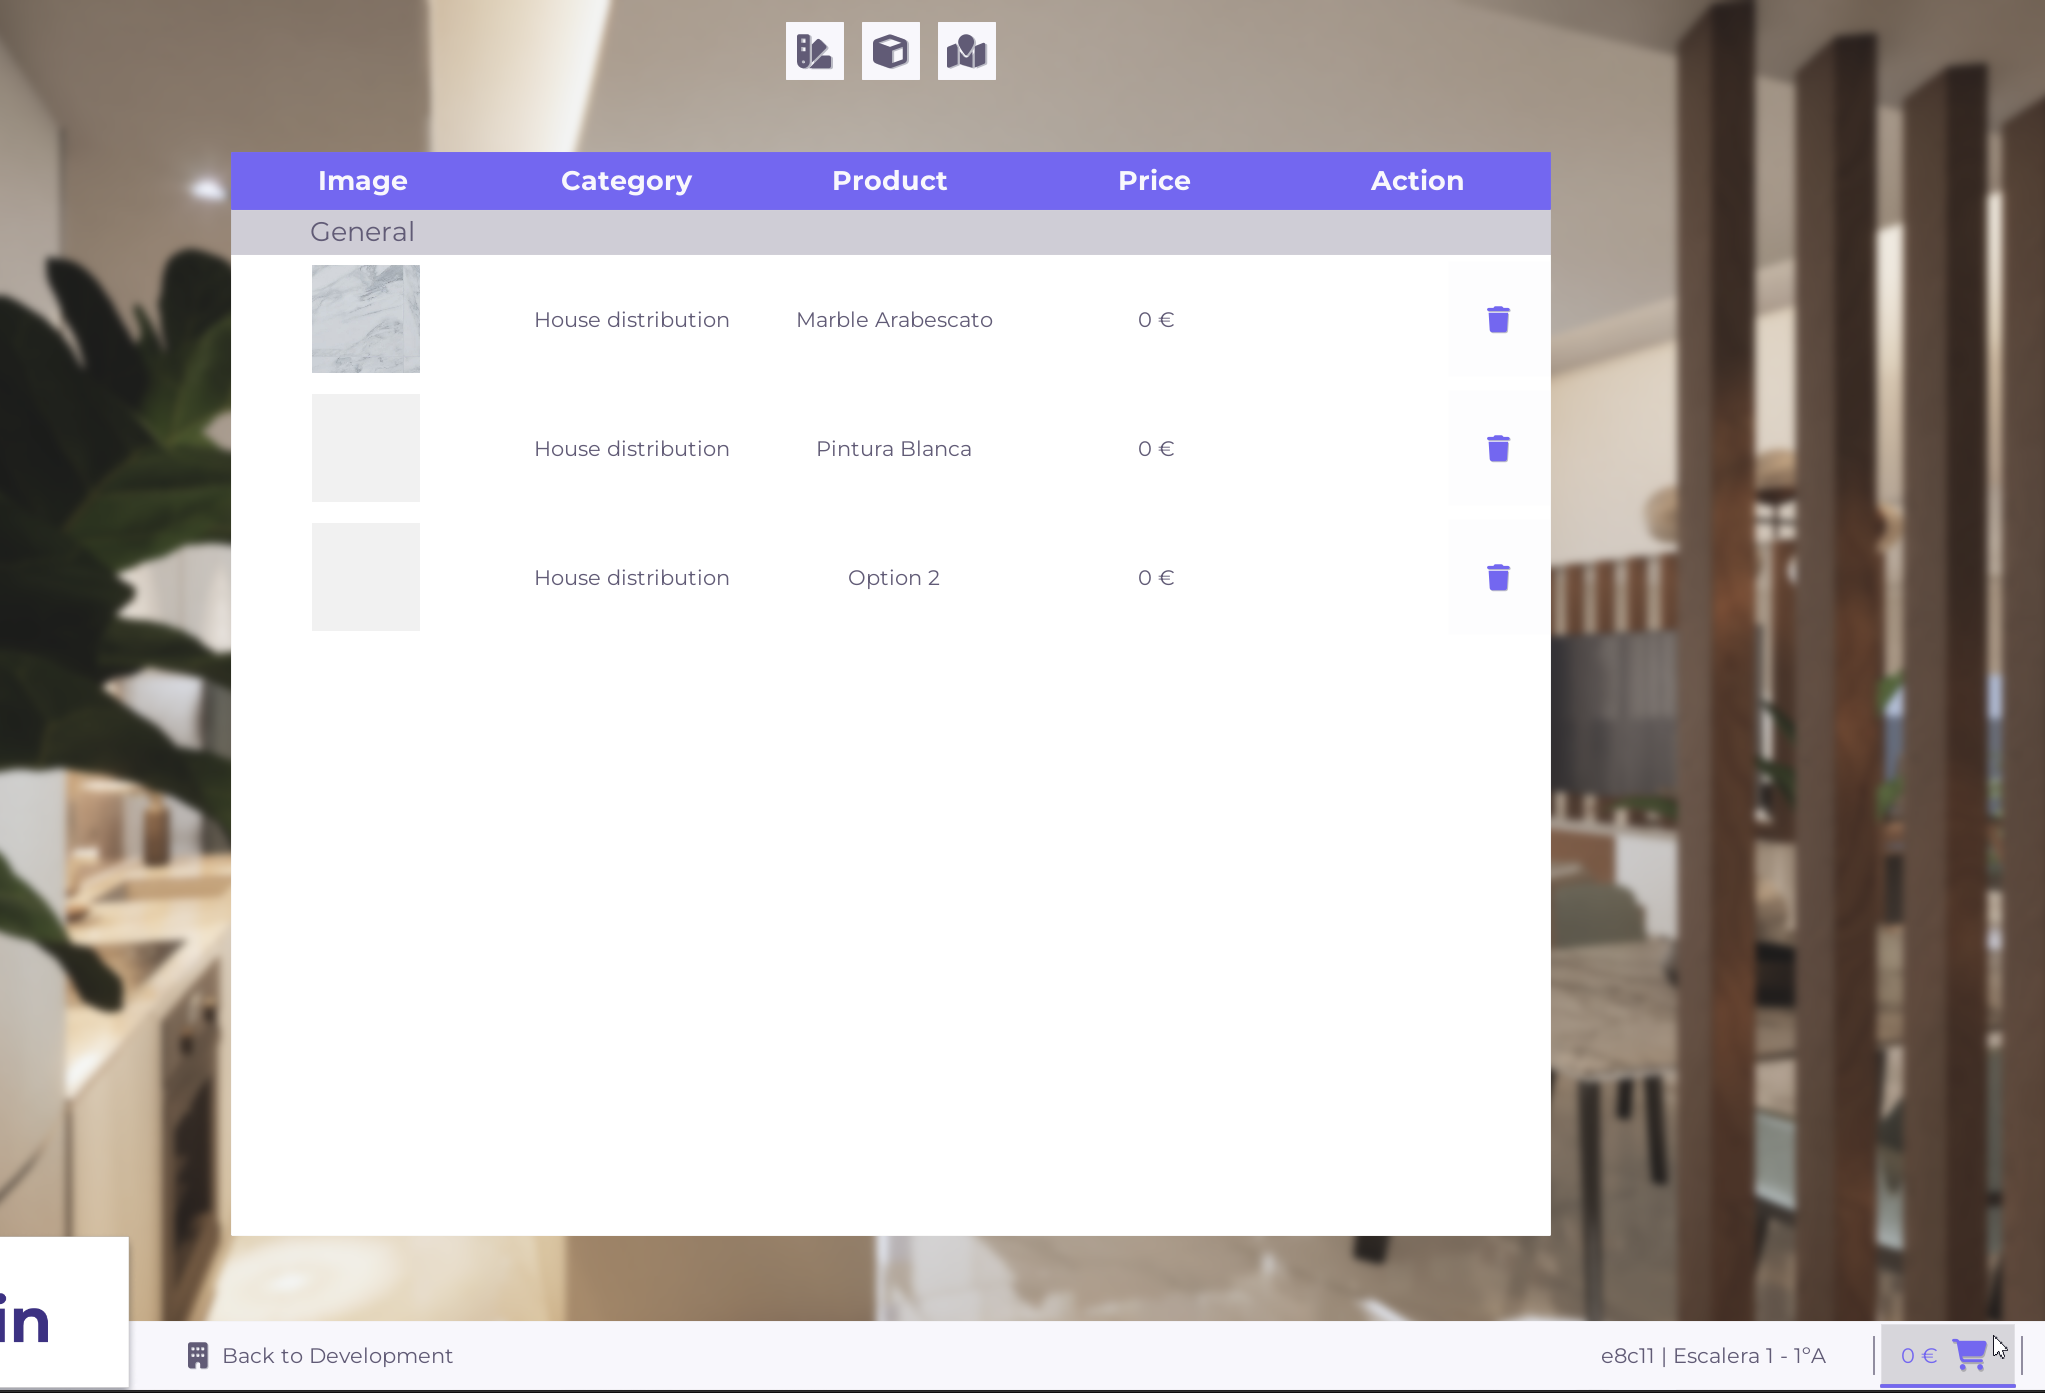
6. List of changes and budgeting
In this part you can see how much is the current amount of the budget and it is also a button to open the panel where you can see in detail the changes and their prices.