Setup Exteriors Map
The exterior maps are designed to visualize the whole building or buildings where the units are located. In this general view you can control the visibility of the volumes of the unit and the selection of these in order to later manage and visualize the data.
GameMode Outdoor Configuration
To ensure that the map has the features required for an outdoor virtual tour, you must first assign the GameMode correct, which in this case will be GM_ITw_Outside. This game mode provides the key functionalities already preconfigured, such as camera handling, the interaction system and other aspects of the exterior mapping.
Steps to Configure Game Mode
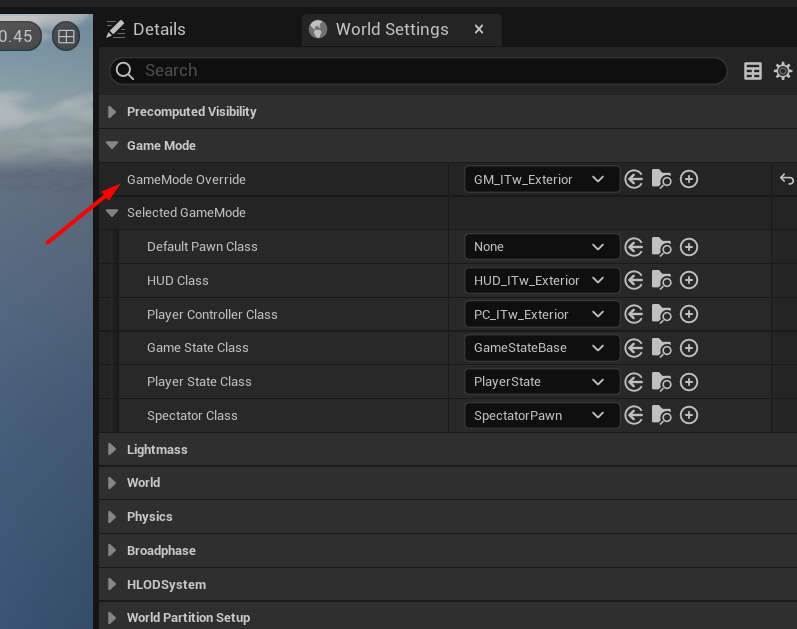
Open the map.
In the Details Panel of the level, select the section World Settings.
Search for the option Game Mode Override and select
GM_ITw_Outsidefrom the drop-down list.Saves the map changes.
With this configuration, the map will use the predefined functionalities in GM_ITw_Outsidefacilitating the creation of the interior route.
UnitVolume configuration from StaticMeshes
The UnitVolume can be placed by hand on the outside level and assigned the StaticMesh However, doing this operation with many units can be tedious and time consuming. To speed up this process, you can prepare the StaticMesh from external modeling programs and be imported into the project together with the building.
The 3D models that will represent the UnitVolume in the display must be correctly separated in StaticMesh each one to correspond to a Unit.
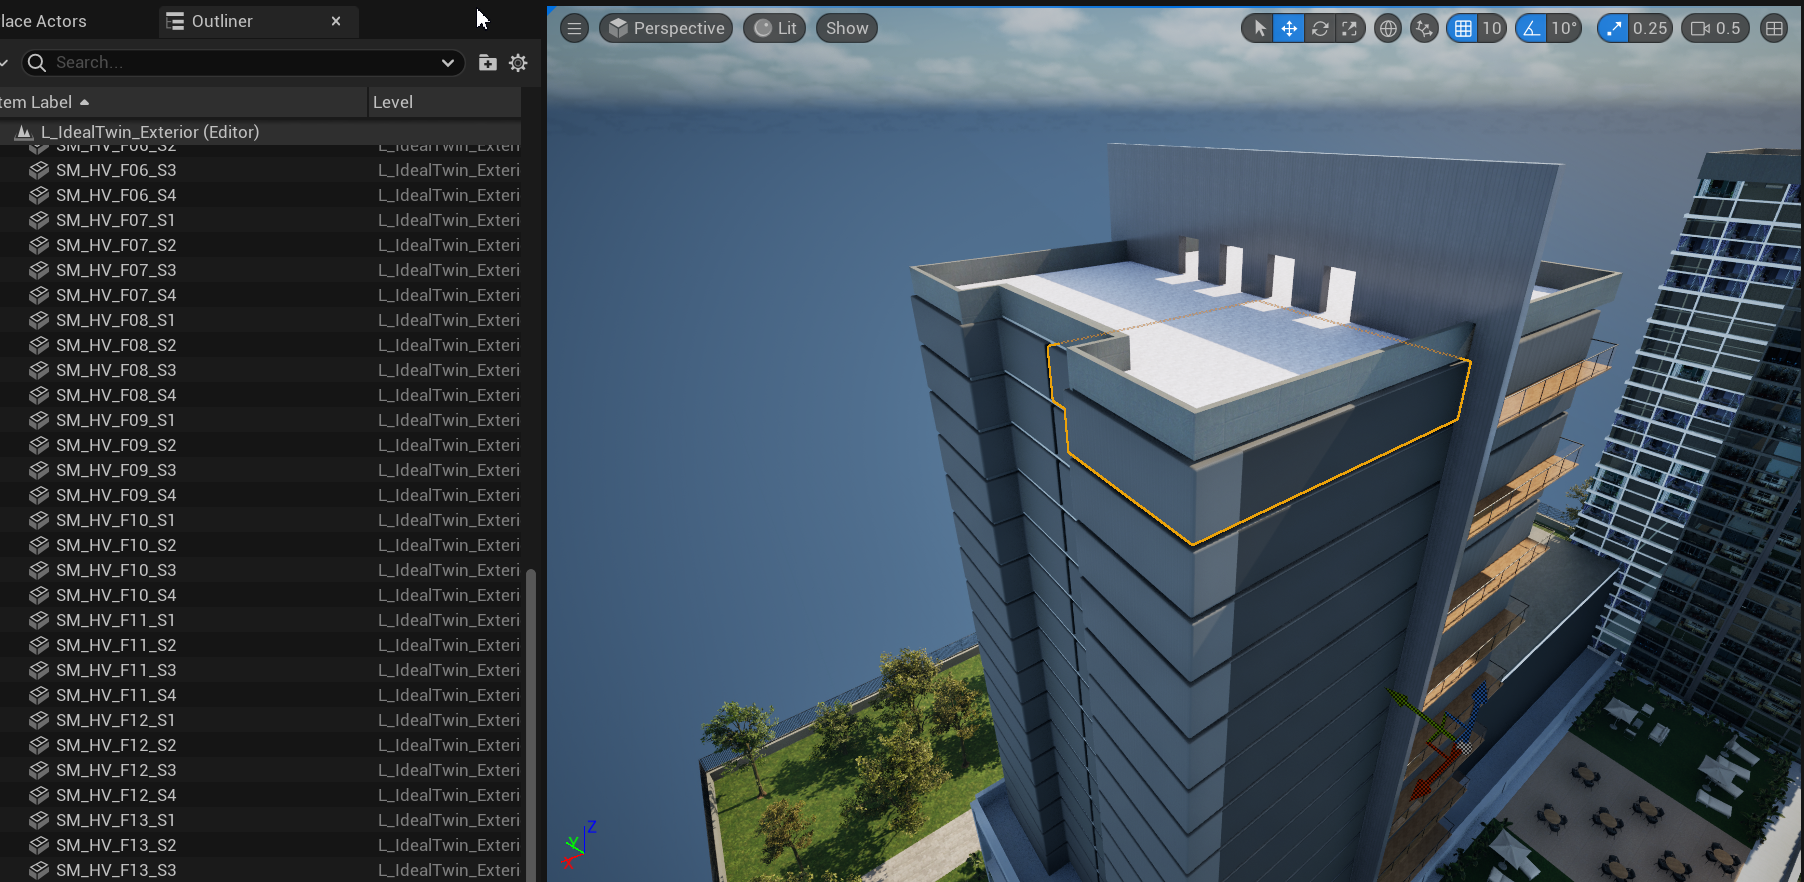
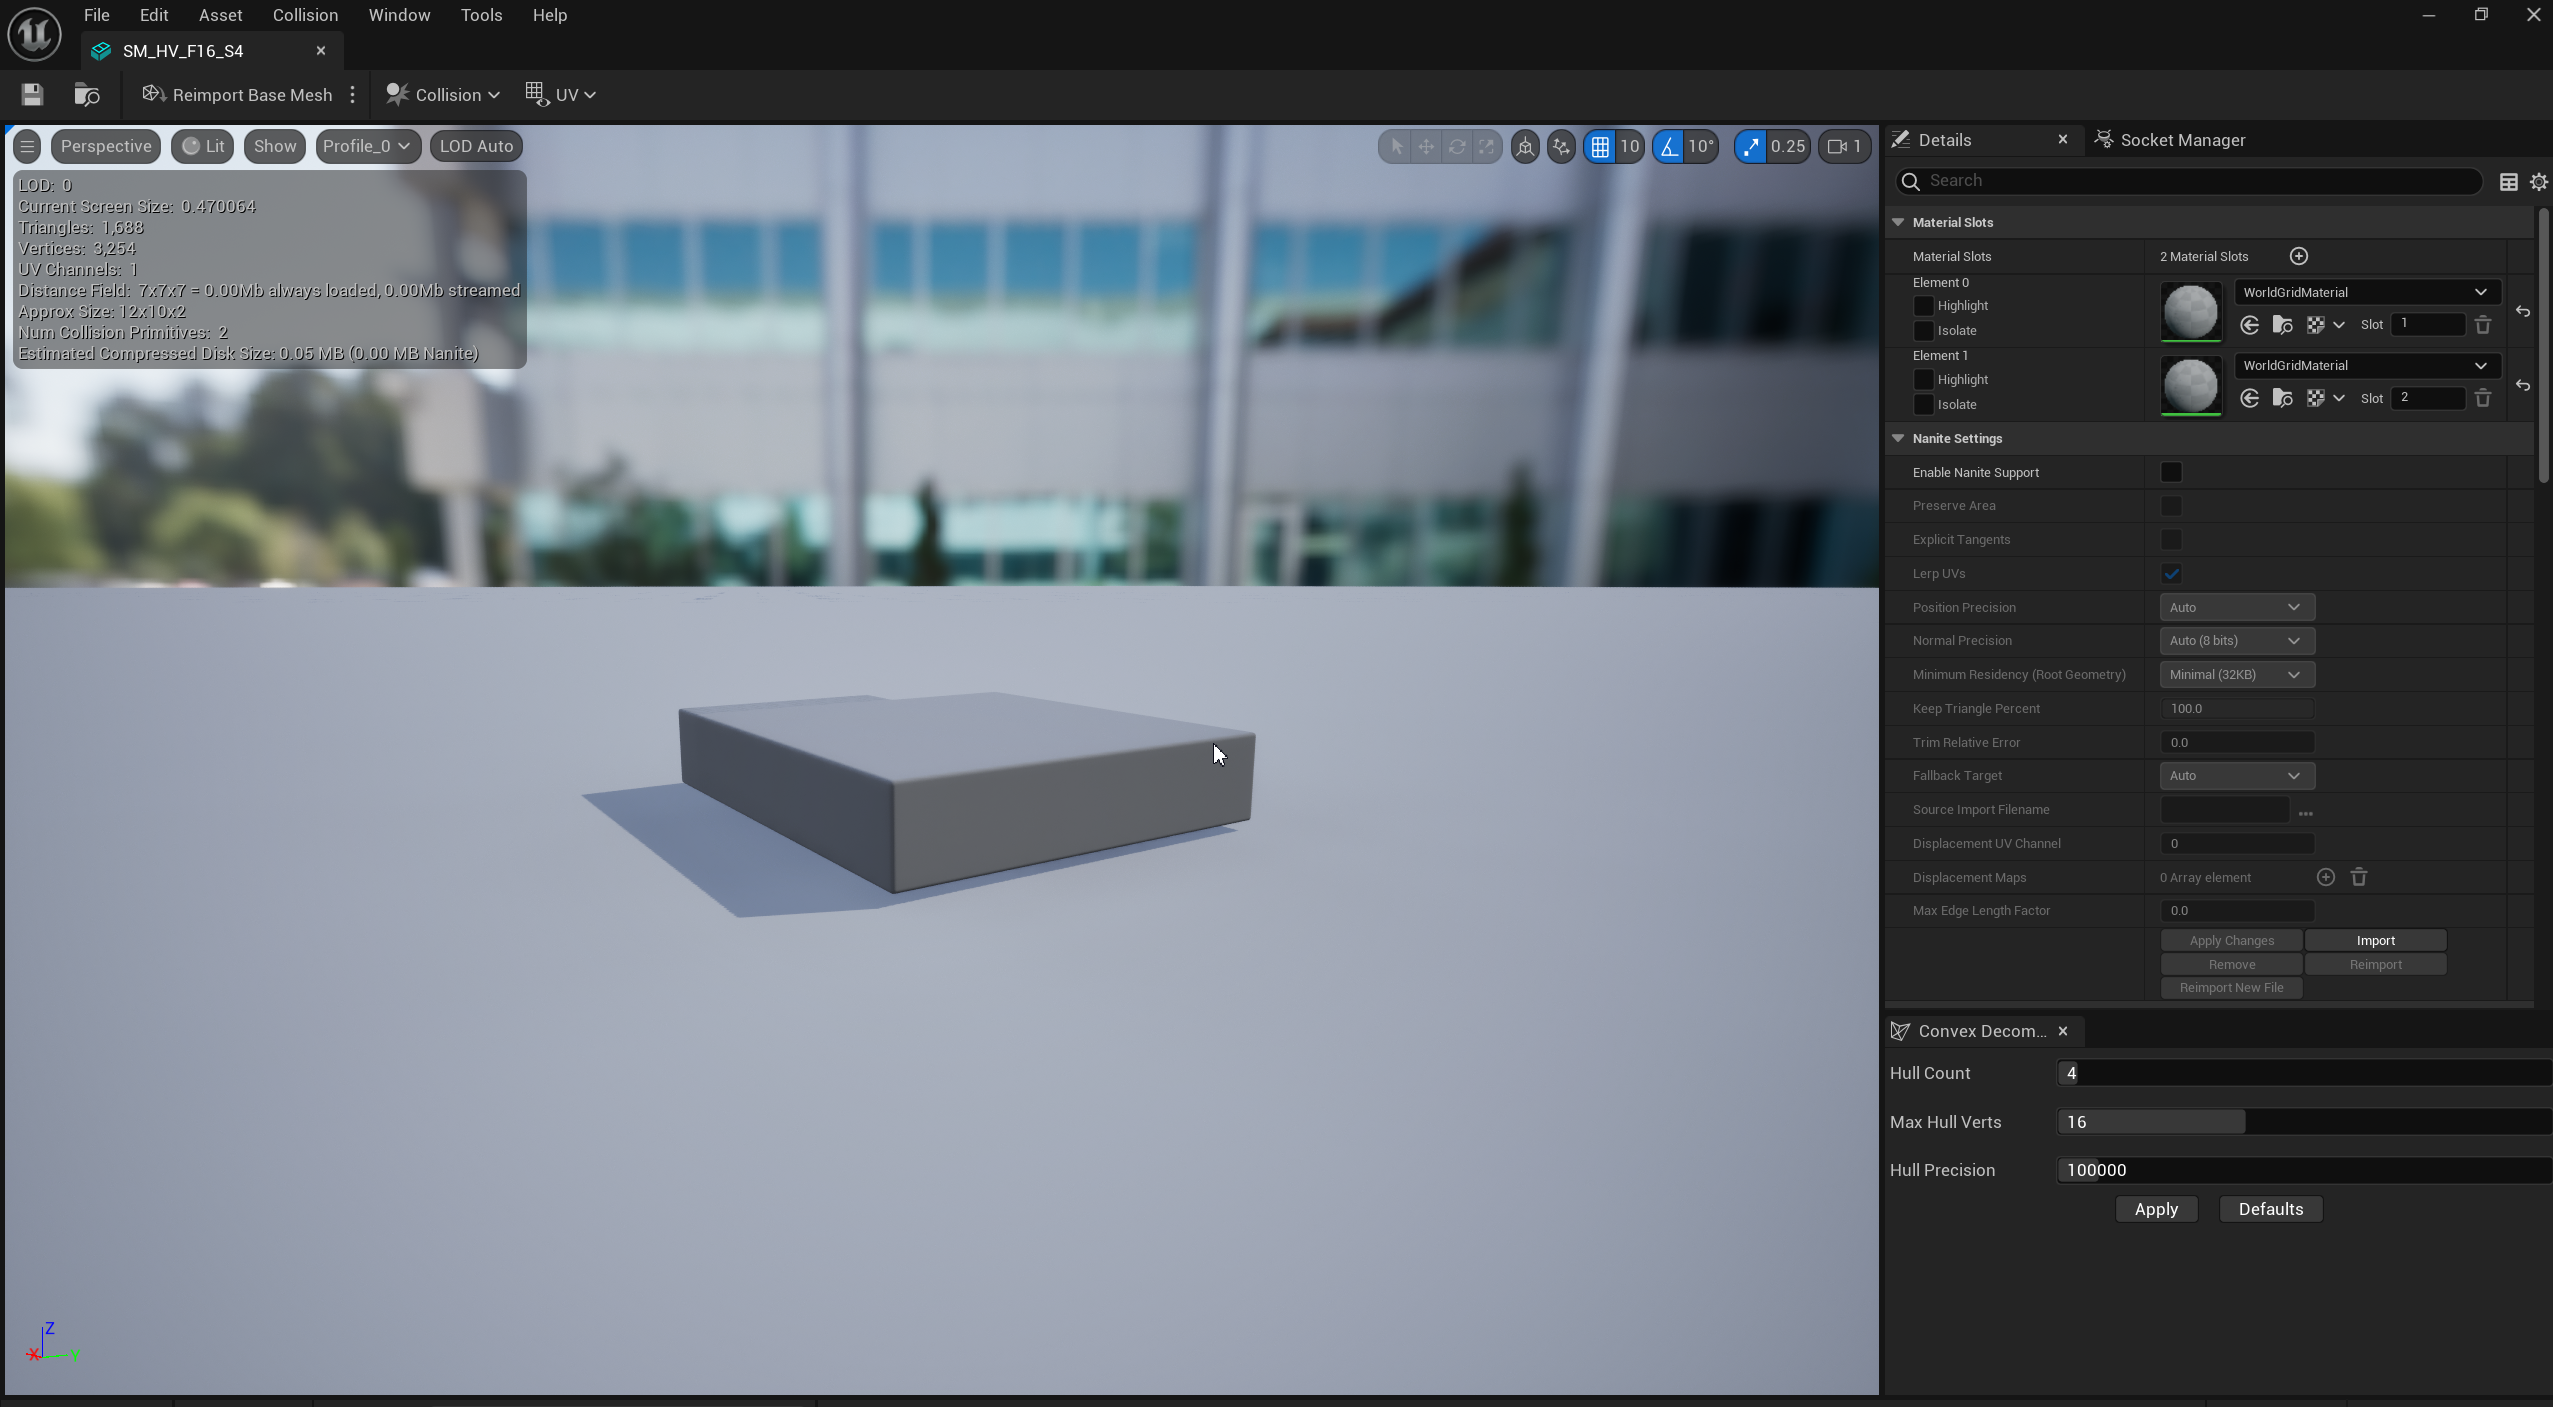
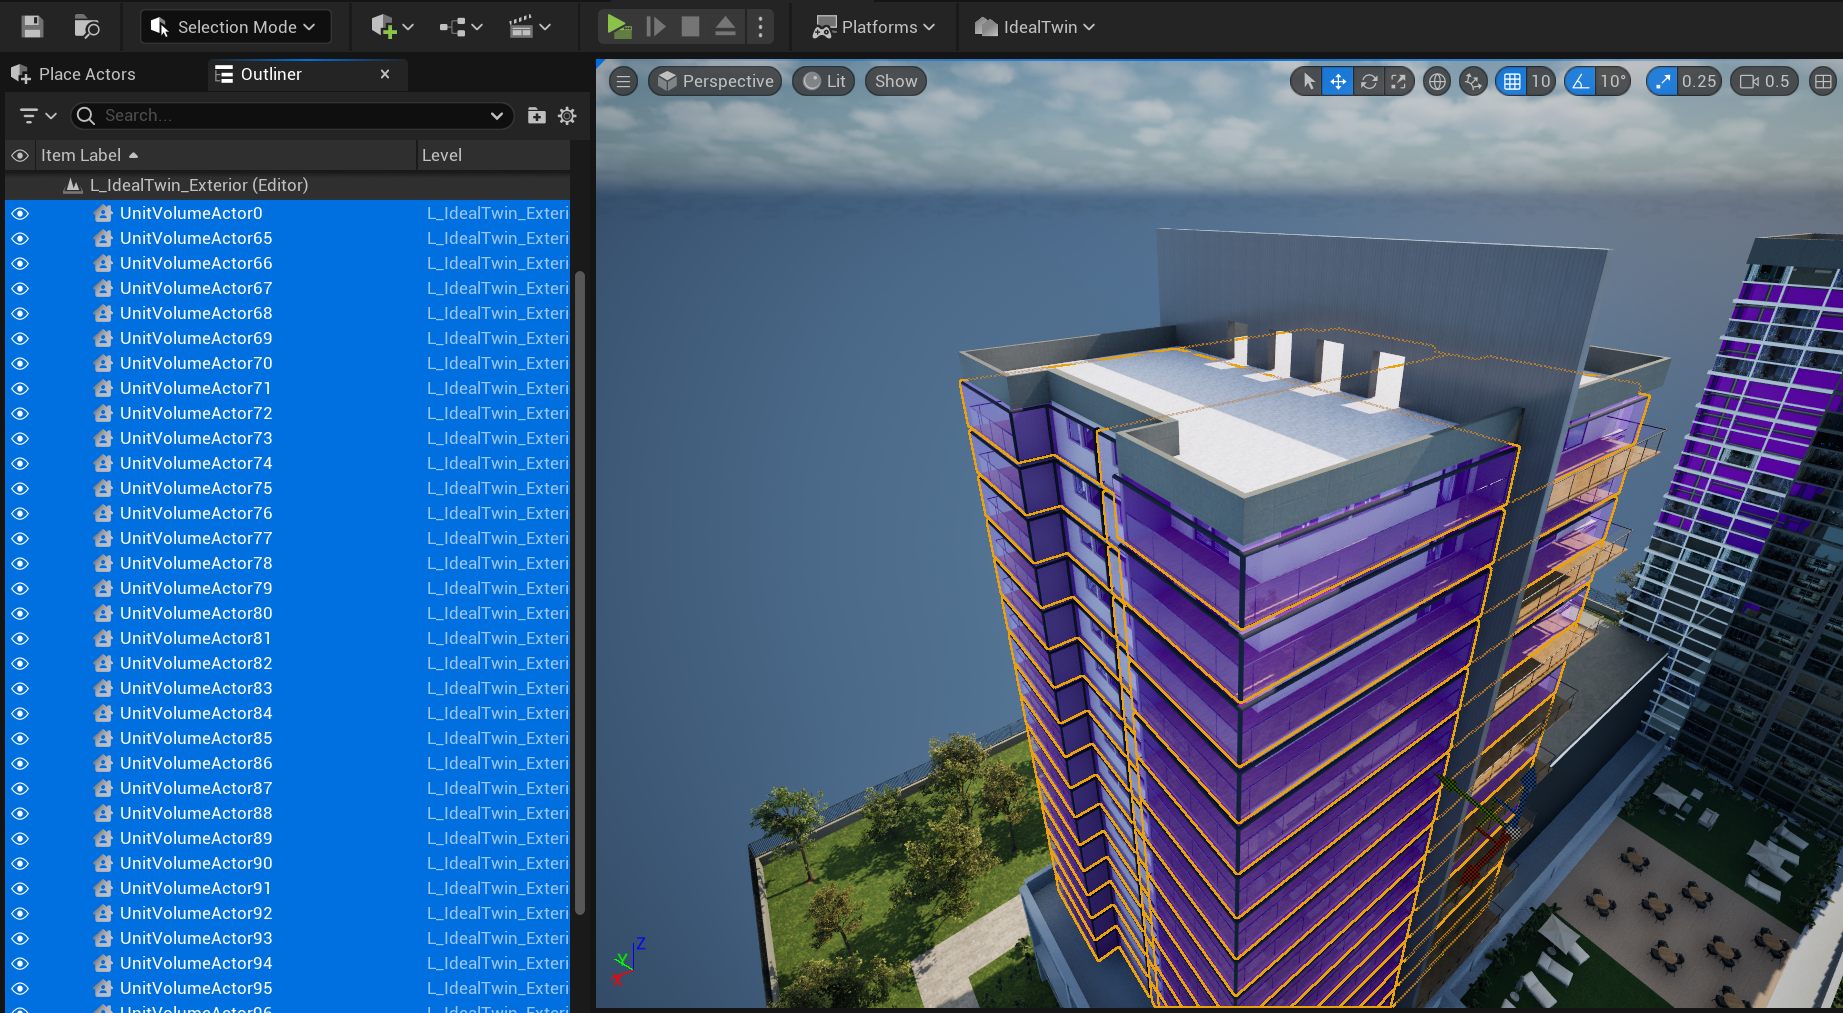
Once these resources have been created in the project and placed in the project, you can use the conversion tool prepared by the project by selecting the StaticMeshActor the following are created UnitVolumeActor
Assigning identifiers to UnitVolumeActors
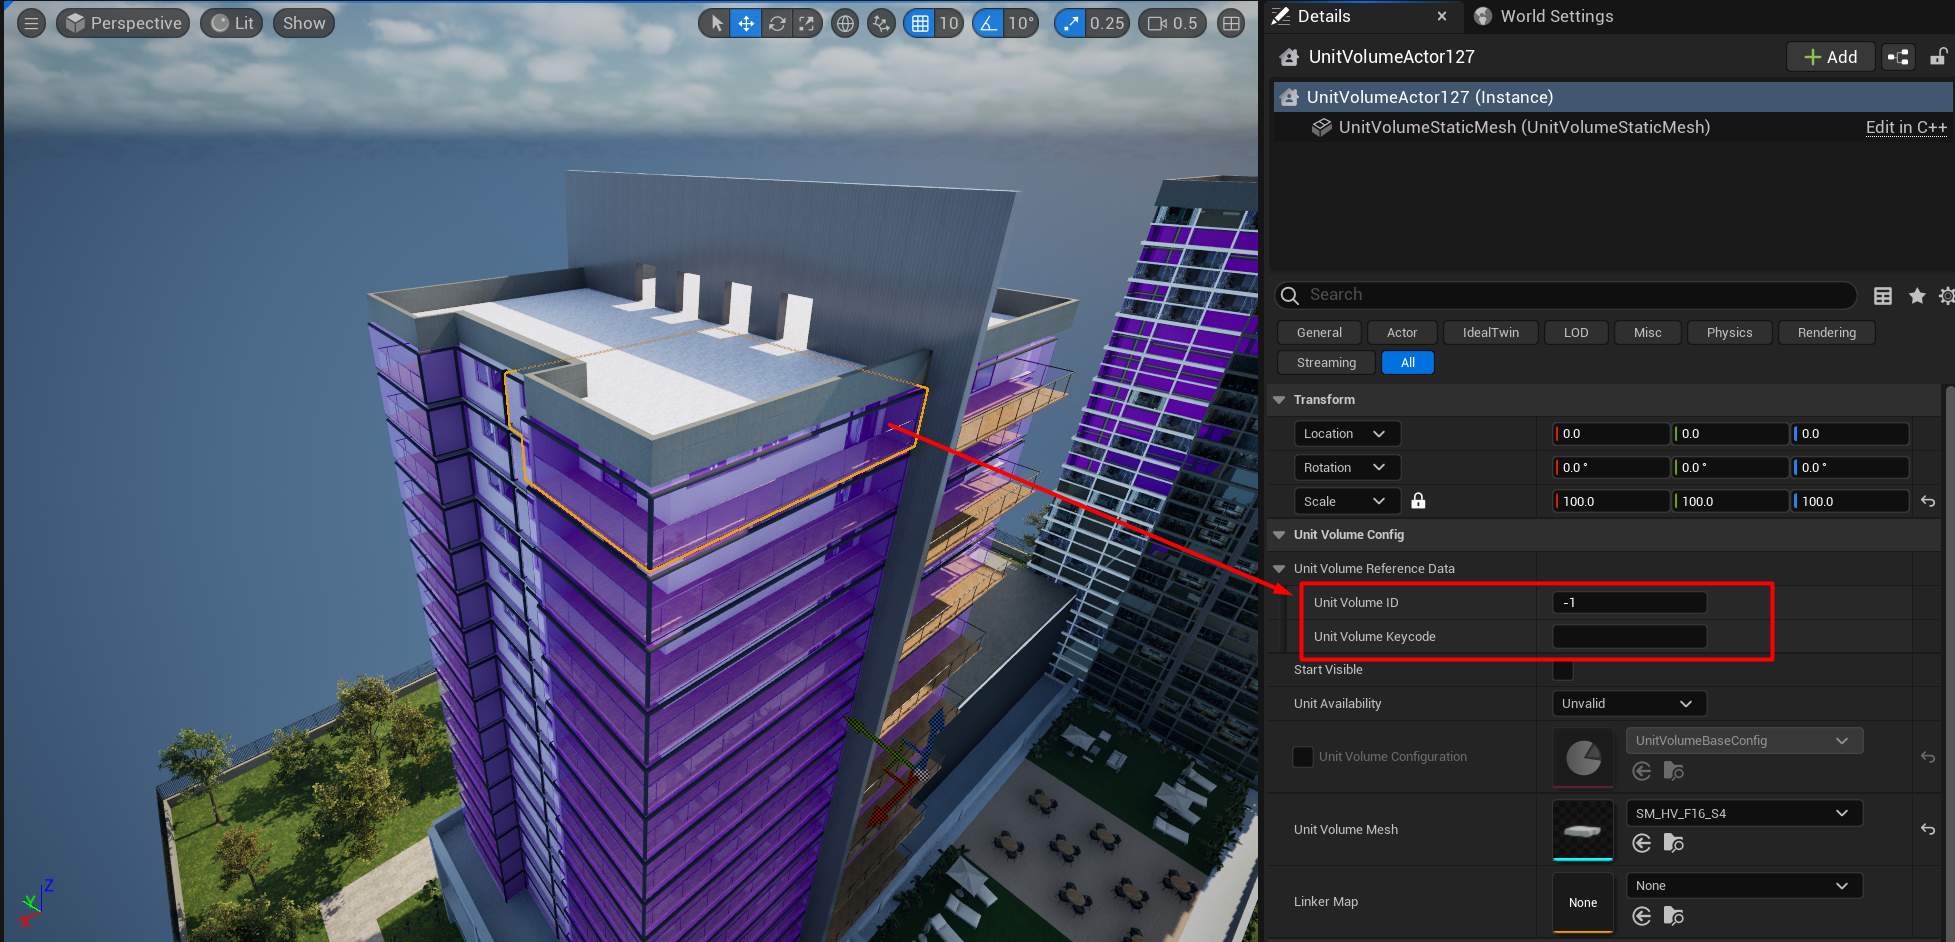
The UnitVolumeActor In order to be cross-referenced with the data coming from the web, it is necessary that these actors have a unique identifier that will allow them to search their data and make a correct visualization.
For the assignment of this data, the data manager found in the IdealTwin Developer Panel.
When opening the panel we have to select the
Developmentin which we are located to obtain the list of all the Units assigned to it.With this list we will be able to find next to each of the records an assignment button.
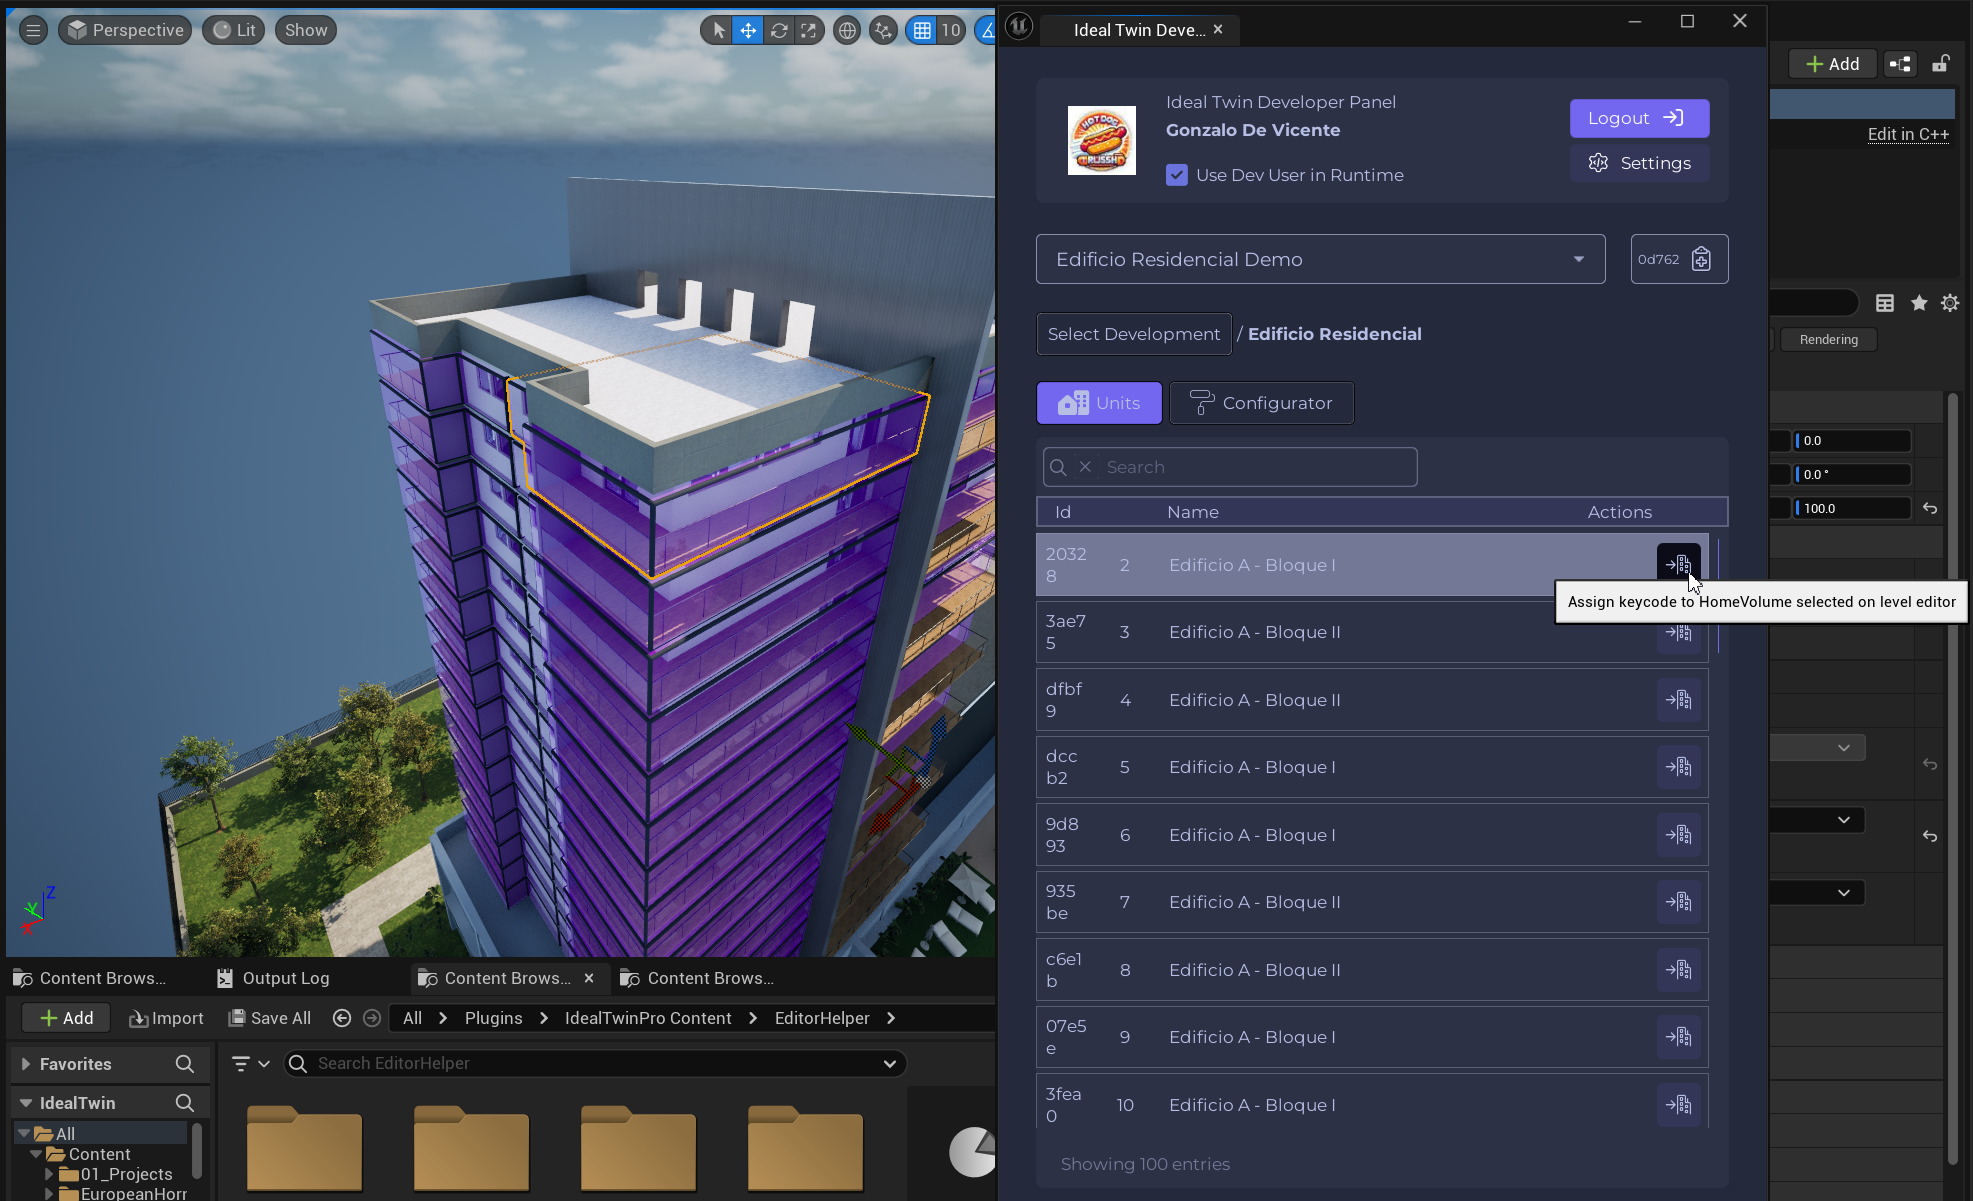
Click on the
UnitVolumeActoryou want to assignClick on the assignment button to make the
UniVolumeActorselected is set with the web identifier
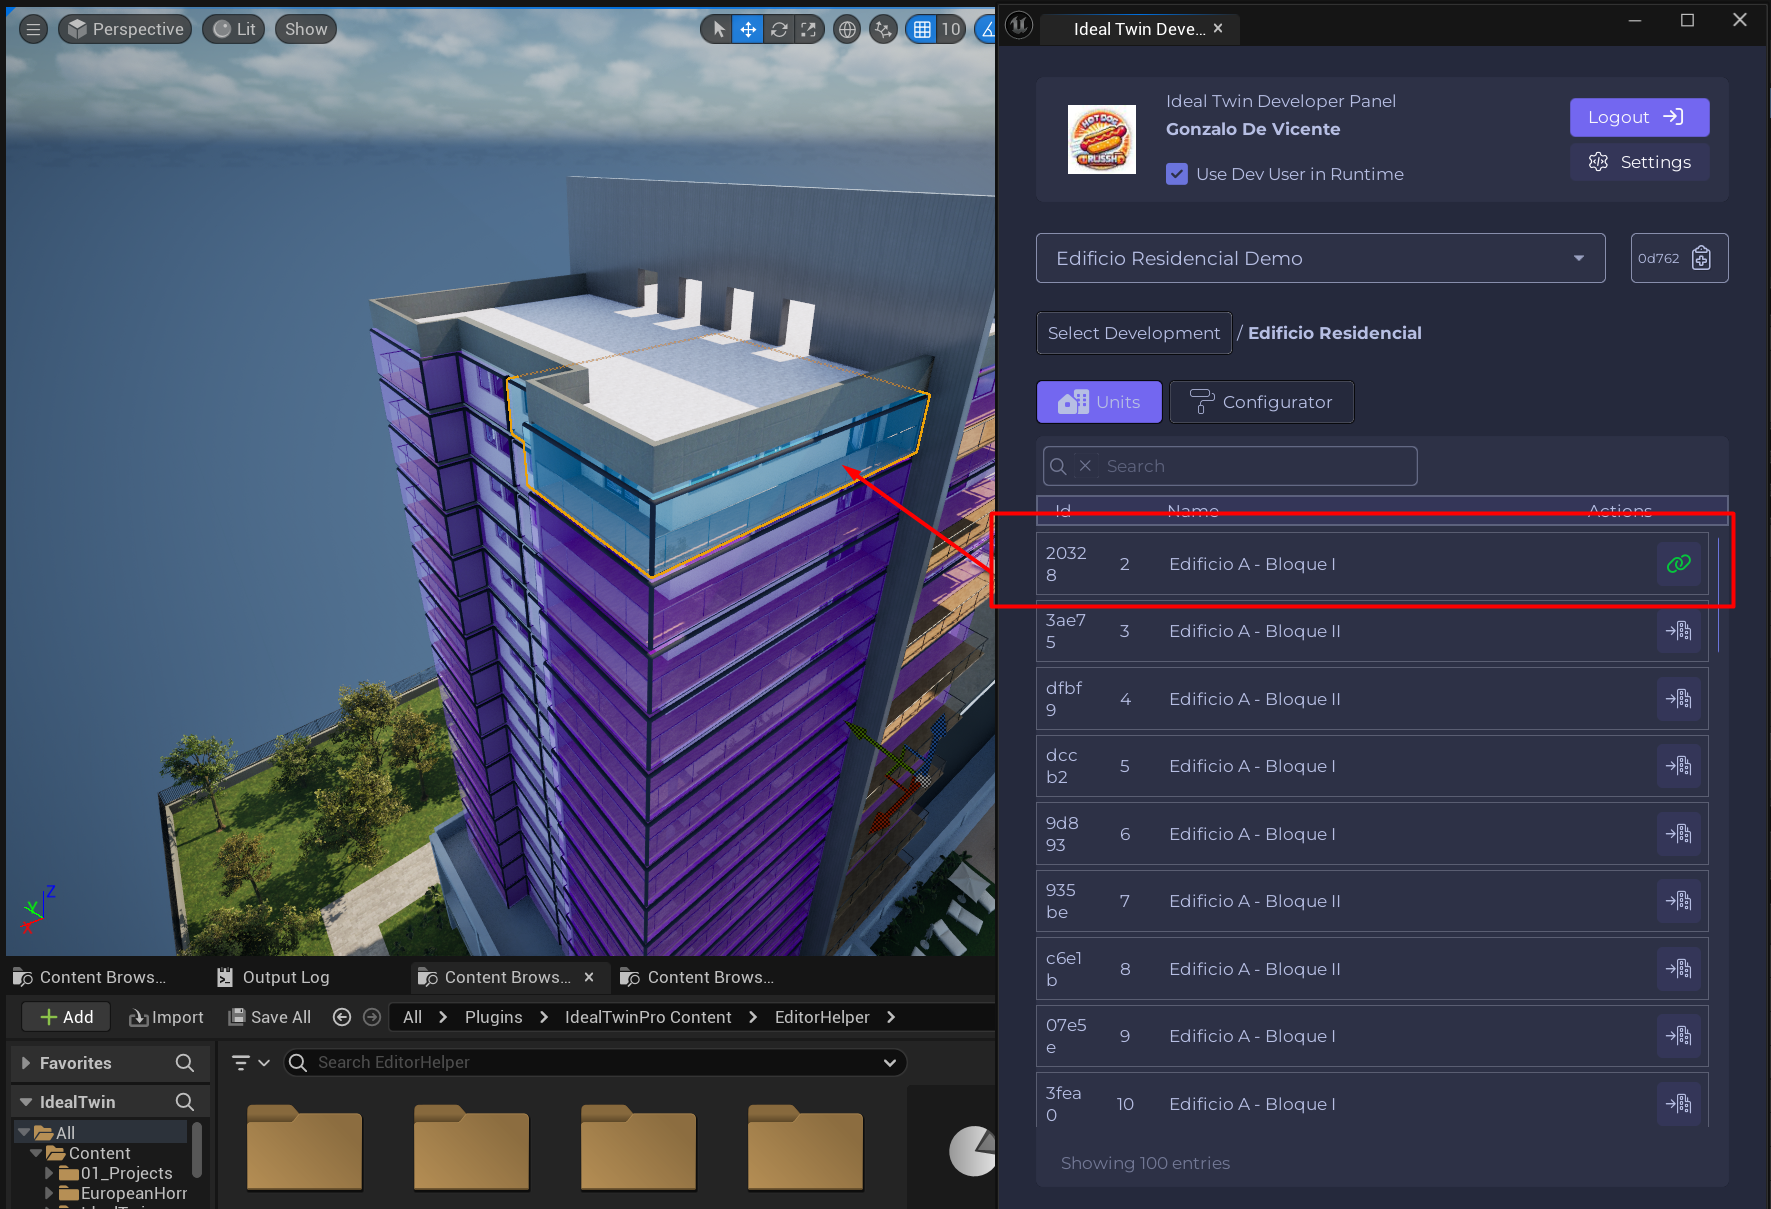
Once assigned it will change color as a visual notification that it has been assigned correctly. You can also see how the button changes icon as the data is assigned to an element within the level.
The UnitVolumeActor that do not have a web identifier will not be cross-referenced with the web data and will therefore be invisible in the panels, nor will they be affected by other selection systems such as the UnitsVolumeManager.
Set the UnitVolumesManager
This actor is in charge of assigning data from the web, visualization and selection of the data, as well as of the UnitVolumeActor can be found in the Place Actor within the category of IdealTwin.
This actor only needs to be instantiated in the level regardless of its location, and it will never be visible in execution since it is only in charge of managing the other elements.
Setting the IdealTwinLevelConfigurator
This class gives extra information to other systems to make them work correctly. In the exterior maps it is important to have the reference of the promotion that is being used in the level. It can also be found in the Place Actor within the category of IdealTwin.
Place the actor inside the level, it can be placed anywhere.
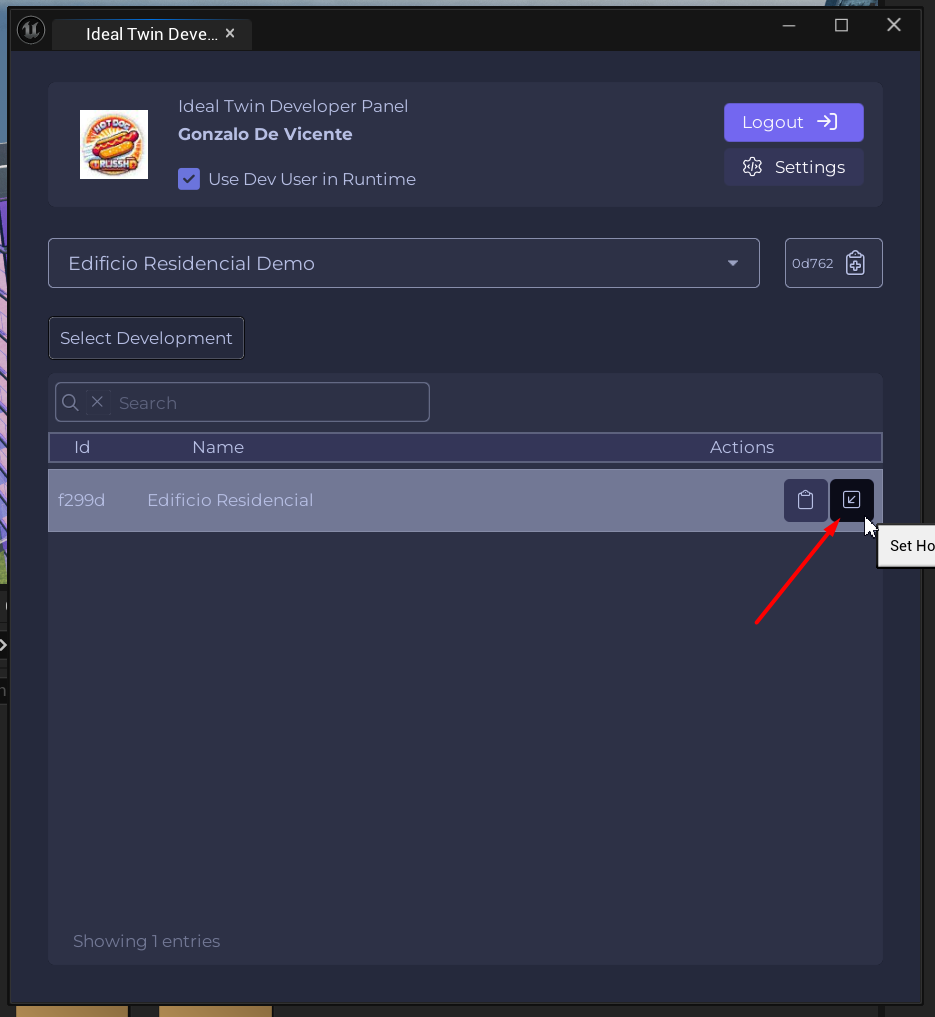
Open the developer panel and search for the promotion to which the level refers.
Click on the side action button that will assign to the
IdealTwinLevelConfiguratorthe identifier automatically.
Without having the promotion identifier, the systems will not find out which promotion it is and the information may not be obtained correctly and failures may occur.
Orbital View Configuration
In order to have an orbital view of the environment and of the promotion, it is necessary to put a Pawn already preconfigured with camera movements ready to be used with touch screen or mouse.
Although this is an optional feature, it has integrations with other systems that make the application flow correctly with the GameMode without doing any configuration.
This Pawn can be found in the Place Actor within the category of IdealTwin.
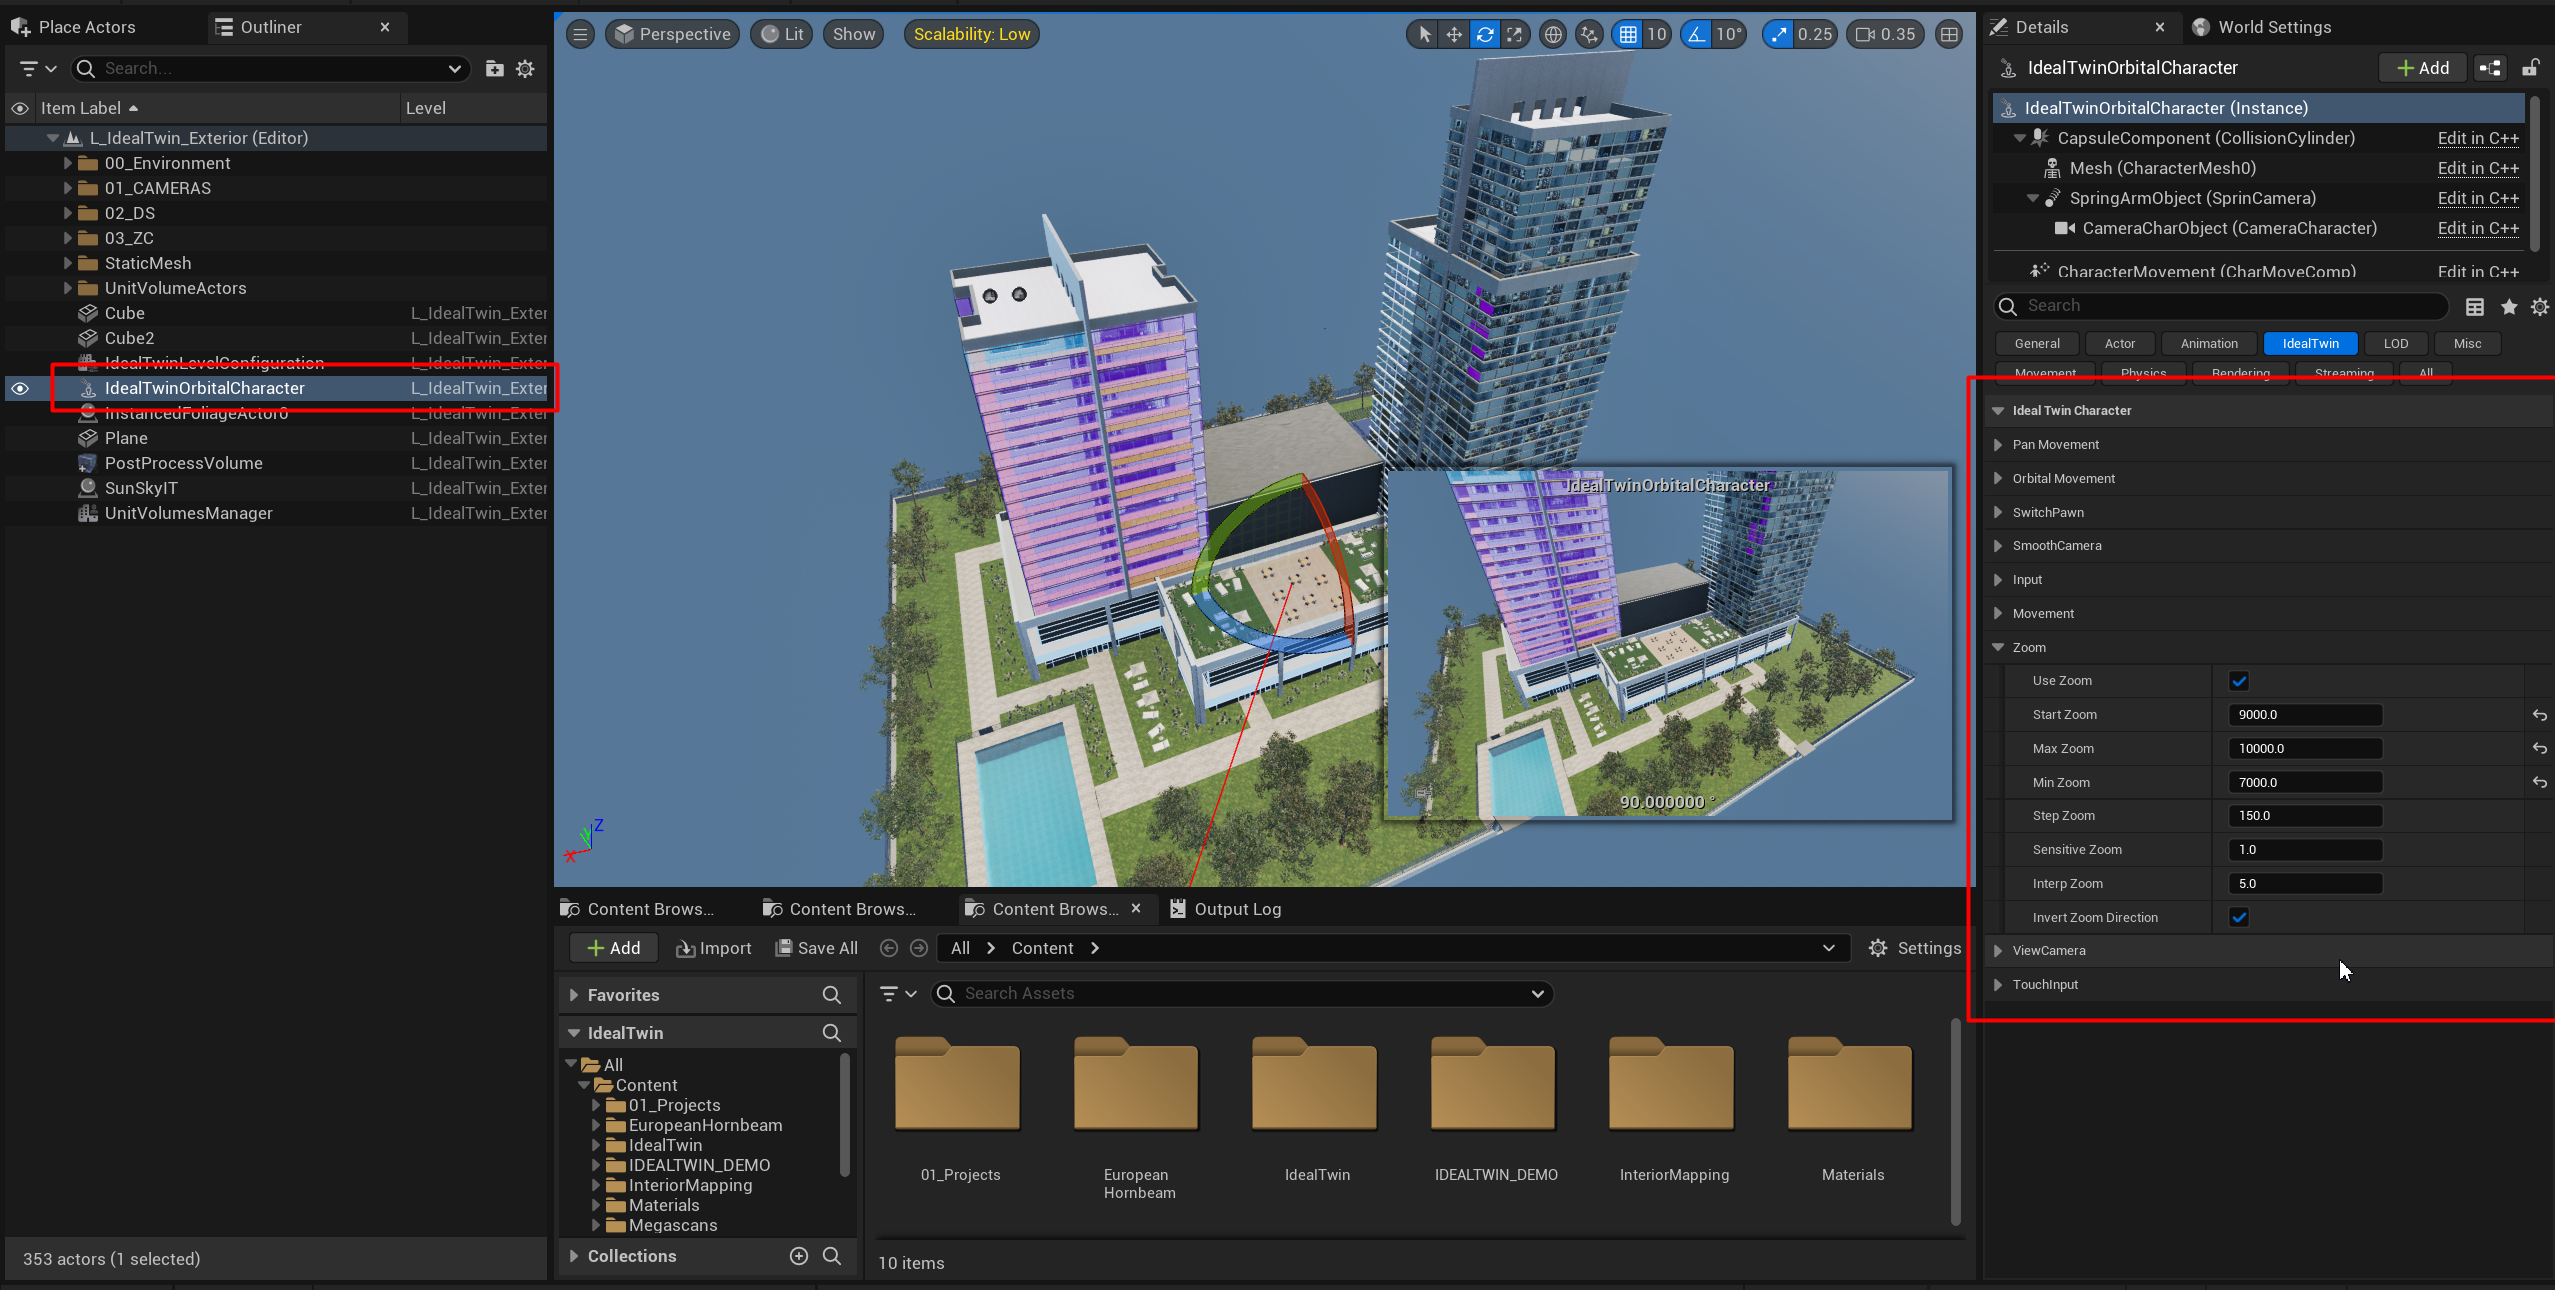
Place the actor inside the level.
Center the pawn taking into account that this will be where it will pivot from.
Modifies the zoom movement values that can be found in the parameters of this Actor.
The integration with the GameMode makes the possession in the execution of the level result directly when searching for the first Pawn with the tag. For more information SwitcherPawnComponent para cambios entre pawns